Drums EQ in Reaper

Creating a polished drum mix in REAPER can transform a good track into a great one. Whether you’re producing jazz, rock, electronic, or anything in between, shaping each drum element individually gives you far more control and clarity. In this guide, I’ll walk through how I prepare and process the x42 Blonde Bop stereo drumkit—starting from a simple MIDI import and ending with a flexible, mix-ready drum bus setup.
I've chosen the x42 Blonde Bop stereo drumkit, and the first thing to do is import a drum track MIDI file.
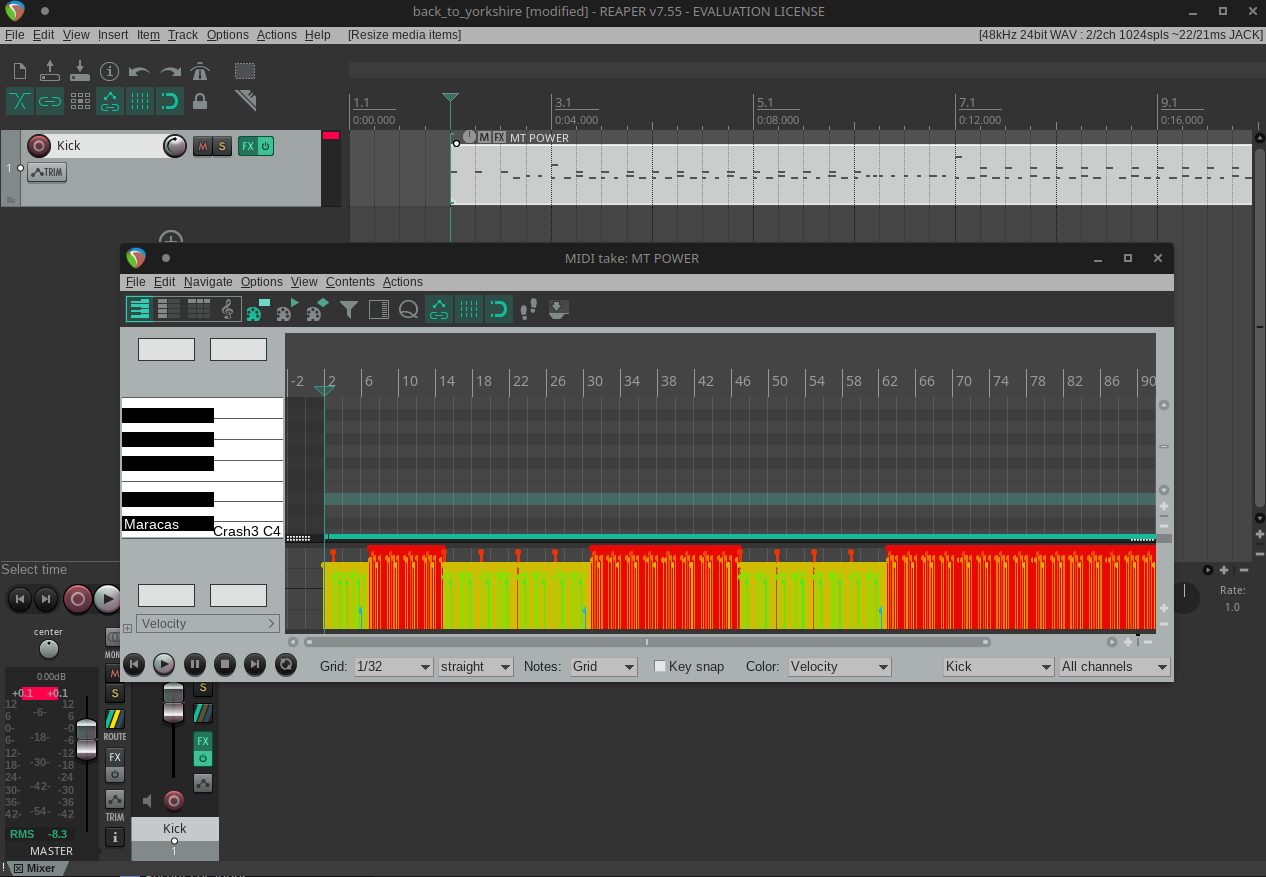
Once you're happy with the overall drum track—humanized, edited, cleaned up—copy and paste it until you have split the Kick, Snare, Hi-Hats, Toms, and Crash cymbals into their own tracks.
Now you can configure any EQ, compression, and effects per drum-kit section, as well as shape the overall kit on the bus track. This is a ballpark guide—always tailor settings to your environment, and, as always, trust your ears!
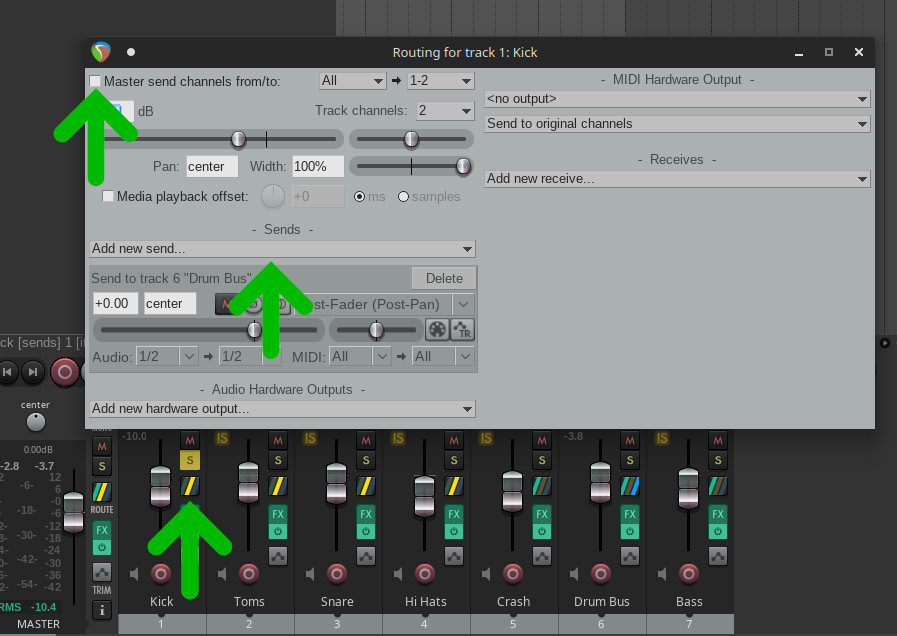

So now you can configure any EQ, compression and effects per drumkit section, and the overall drum kit on the bus track. This is a ball park gauide and will need tailering as per environemnt, use your ears!
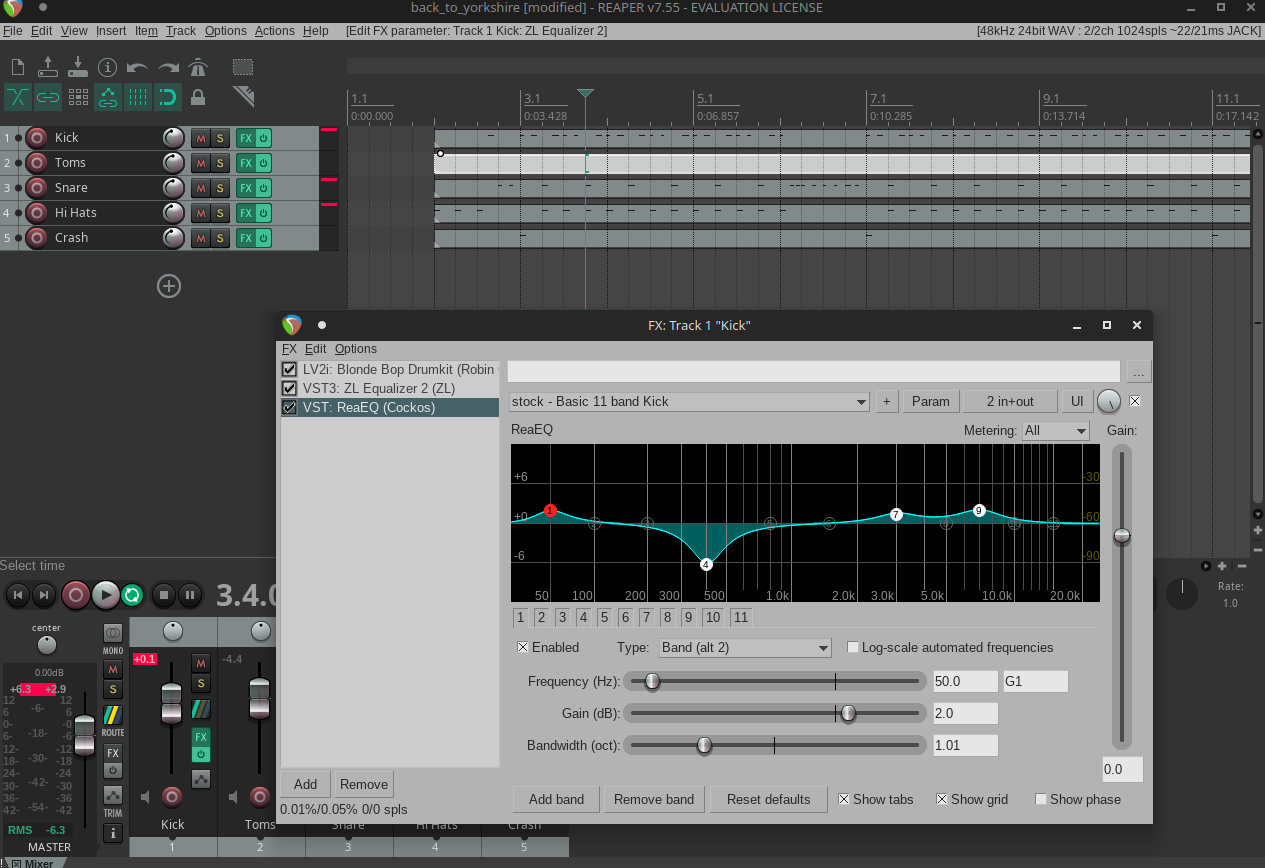
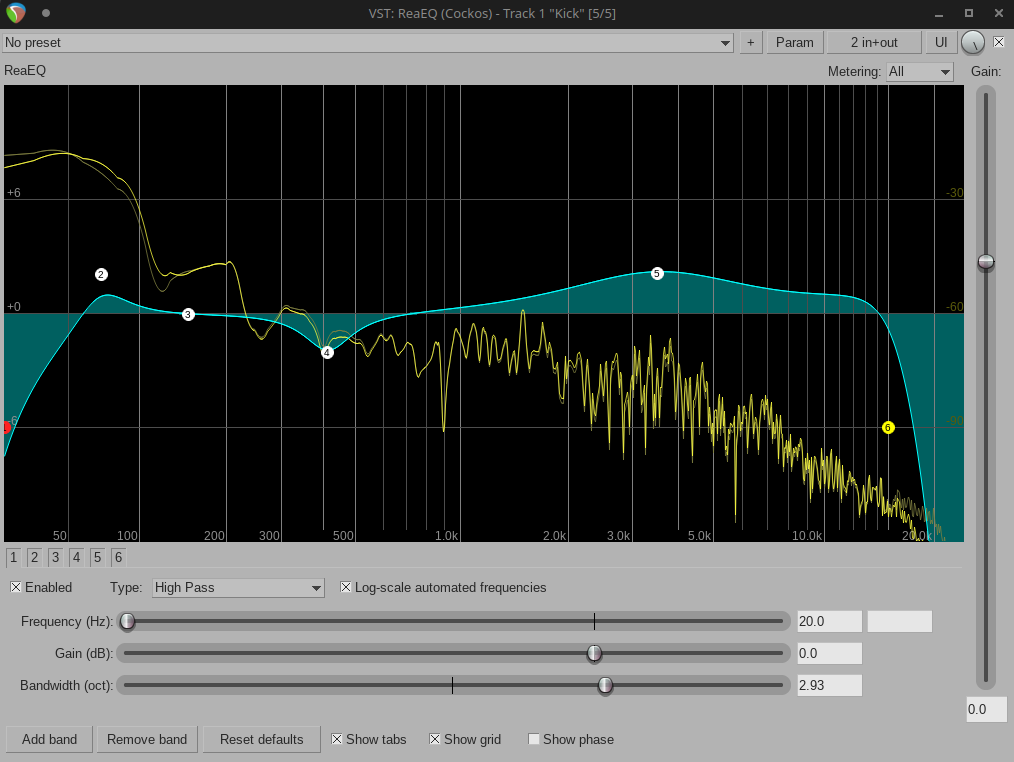
Kick Drum
| Frequency | Recommendation |
|---|---|
| 20Hz | High Pass |
| 50-100Hz | Boost |
| 125-175Hz | Cut |
| 300-500Hz | Cut |
| 3000-4000Hz | Boost |
| 15000Hz | Low Pass |
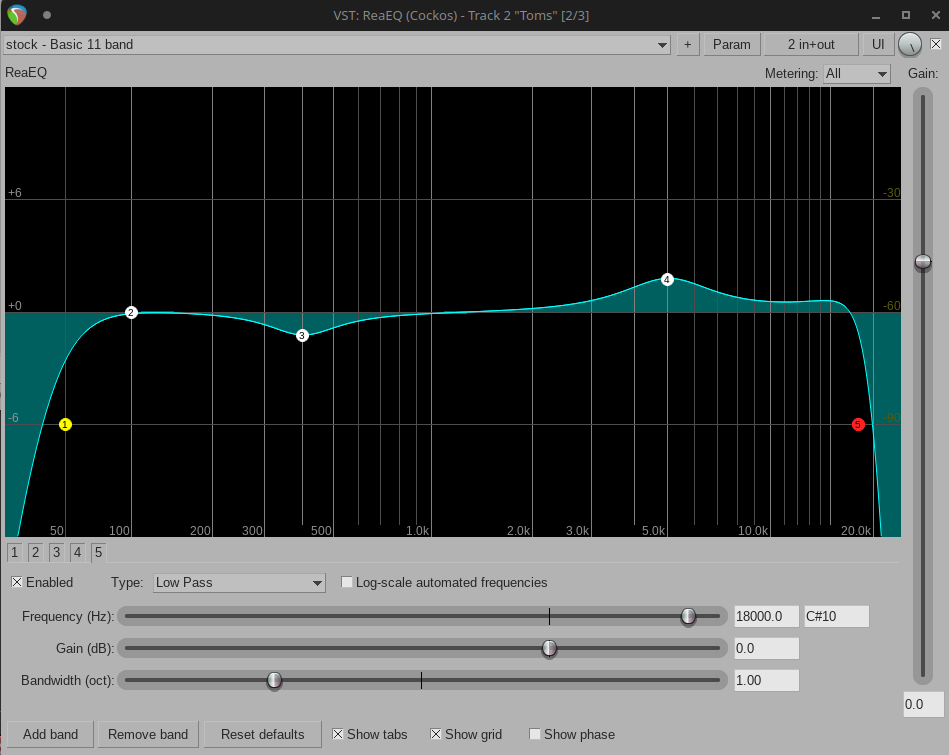
Toms
| Frequency | Recommendation |
|---|---|
| 50Hz | High Pass |
| 400-600Hz | Cut |
| 4500-5500Hz | Boost |
| 18000Hz | Low Pass |
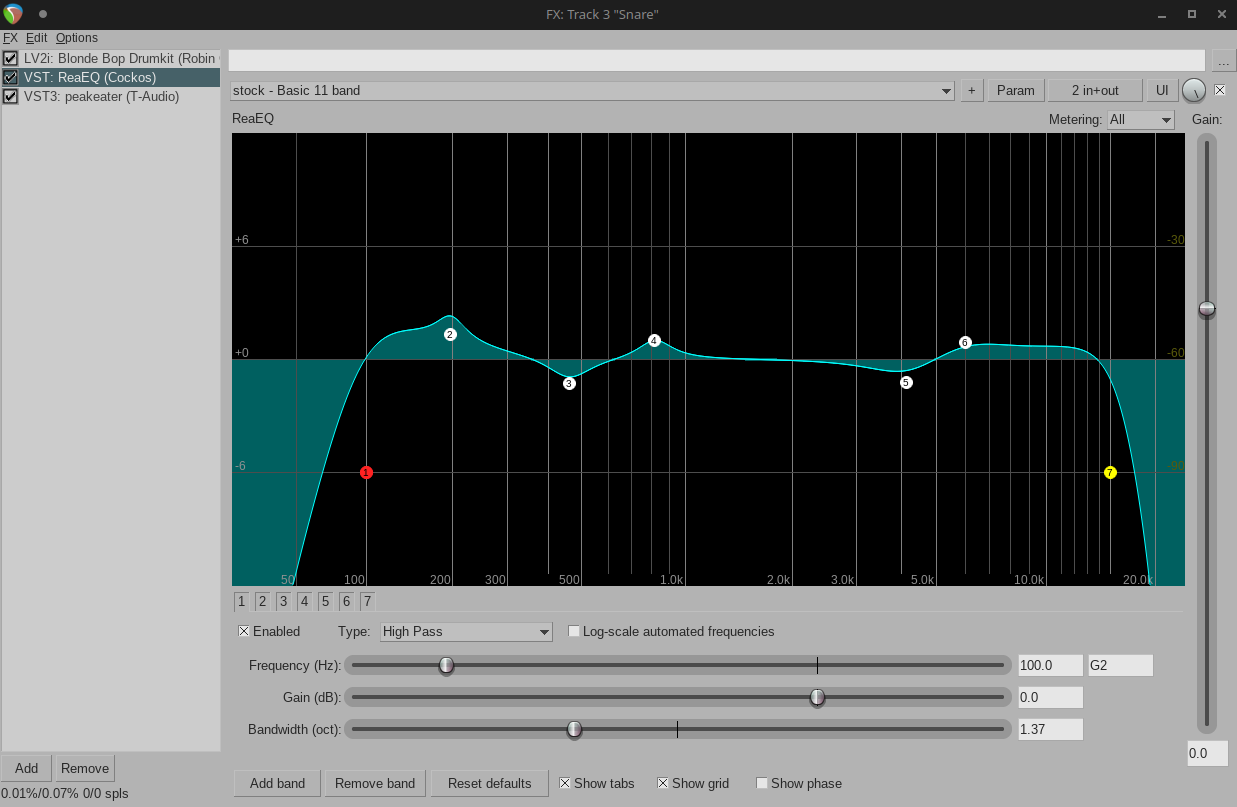
Snare Drum
| Frequency | Recommendation |
|---|---|
| 70Hz | High Pass |
| 150-200Hz | Boost |
| 300-500Hz | Boost |
| 800Hz | Boost or Cut |
| 3000-5000Hz | Boost |
| 5000Hz | Boost |
| 15000Hz | Low Pass |
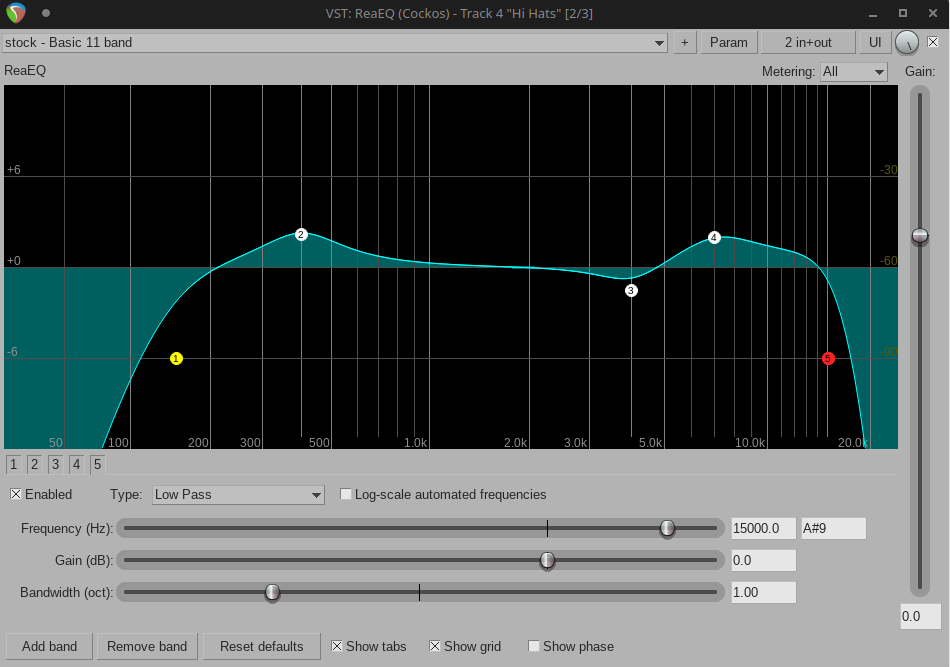
Hi Hats
| Frequency | Recommendation |
|---|---|
| 150Hz | High Pass |
| 400Hz | Boost or Cut |
| 3500-4500Hz | Cut |
| 6500-8500Hz | Boost |
| 20000Hz | Low Pass |
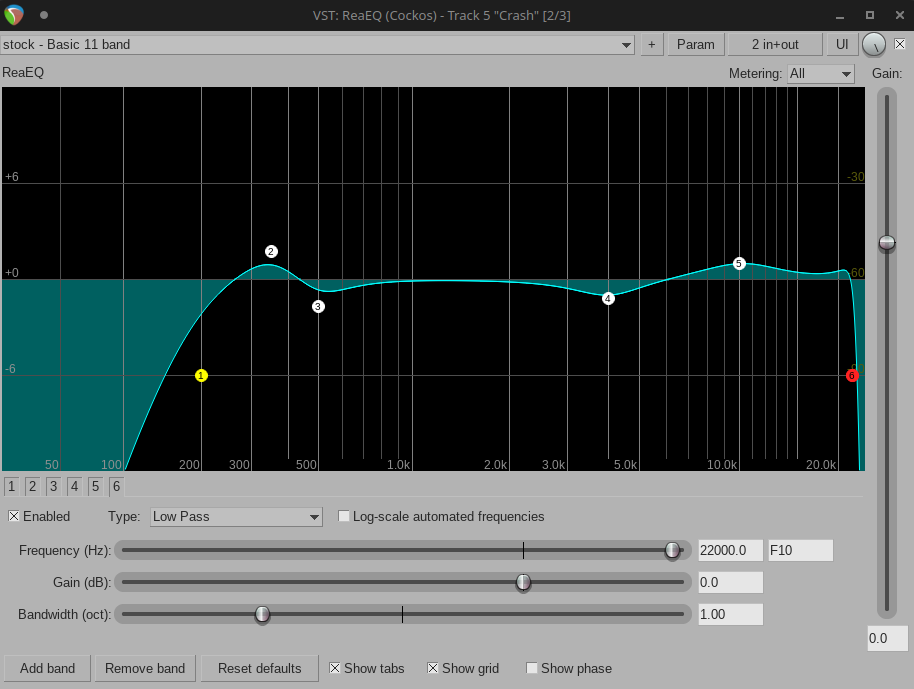
Crash Symbols
| Frequency | Recommendation |
|---|---|
| 200Hz | High Pass |
| 300-400Hz | Boost |
| 400-600Hz | Cut |
| 4000Hz | Cut |
| 10000Hz | Boost |
| 22000Hz | Low Pass |